Is it time to teach your child about verbs? If so, you might be feeling a little anxious about where to start–but don’t worry because I’m here to help! Watch my video to discover the easiest and most memorable way to teach your children all about this important part of speech.
When it comes to Montessori Elementary language work, nothing feels quite as overwhelming to homeschooling parents as the Grammar Box Materials! That’s why I am dedicated to showing you that this amazing resource is really not as complicated as it seems! Before you get started with any material for your children ages 6-12, I recommend reading a good theory album like the one from Keys of the Universe. This will give you a good understanding of the method so that you can better decide which materials will best suit your individual children.
This post is long and detailed because I wanted to make sure I explained everything for those who have asked me to! But if you feel too overwhelmed by all this information, head over to YouTube to watch my latest video where I explain these materials in depth, using the version that I created for our home environment. I’ll also be giving you just a quick look at our homeschool space to show you how we display these materials at our house.
Grammar Boxes: What are they exactly?
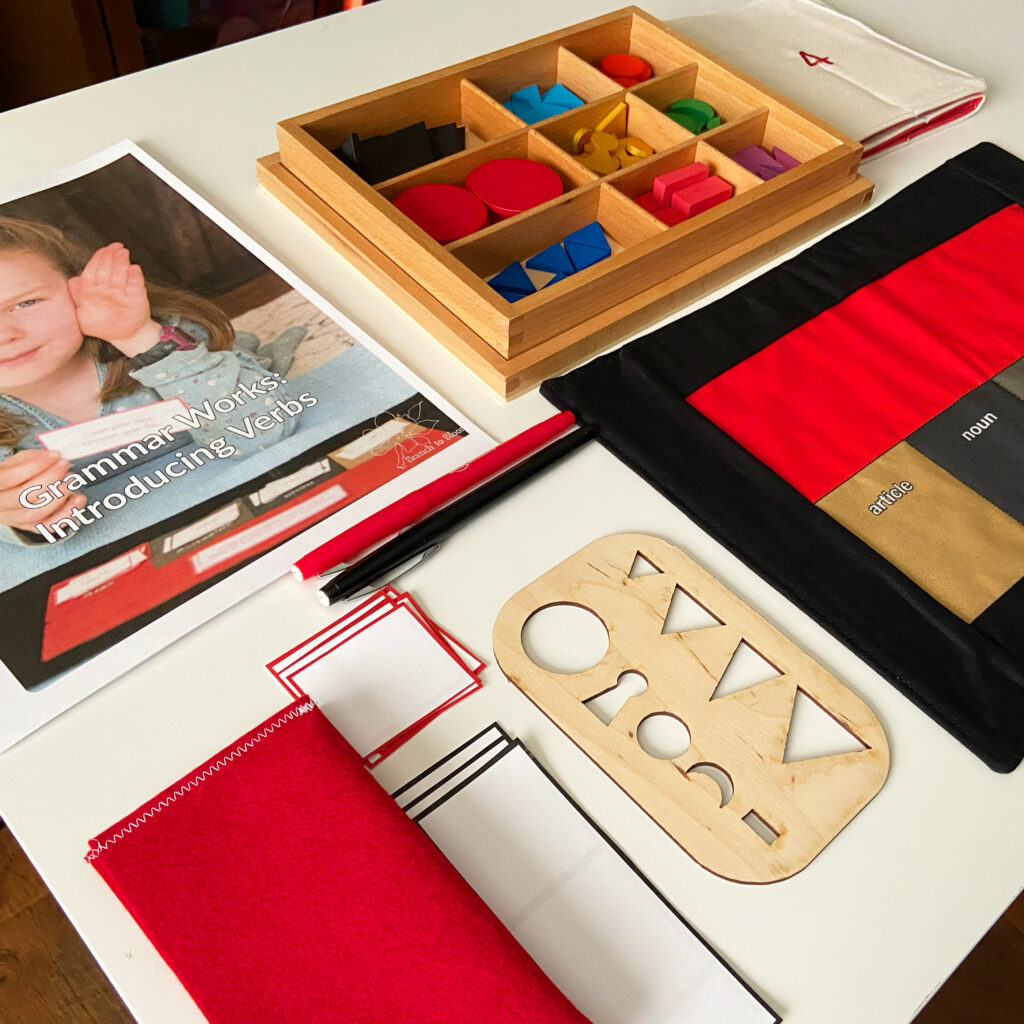
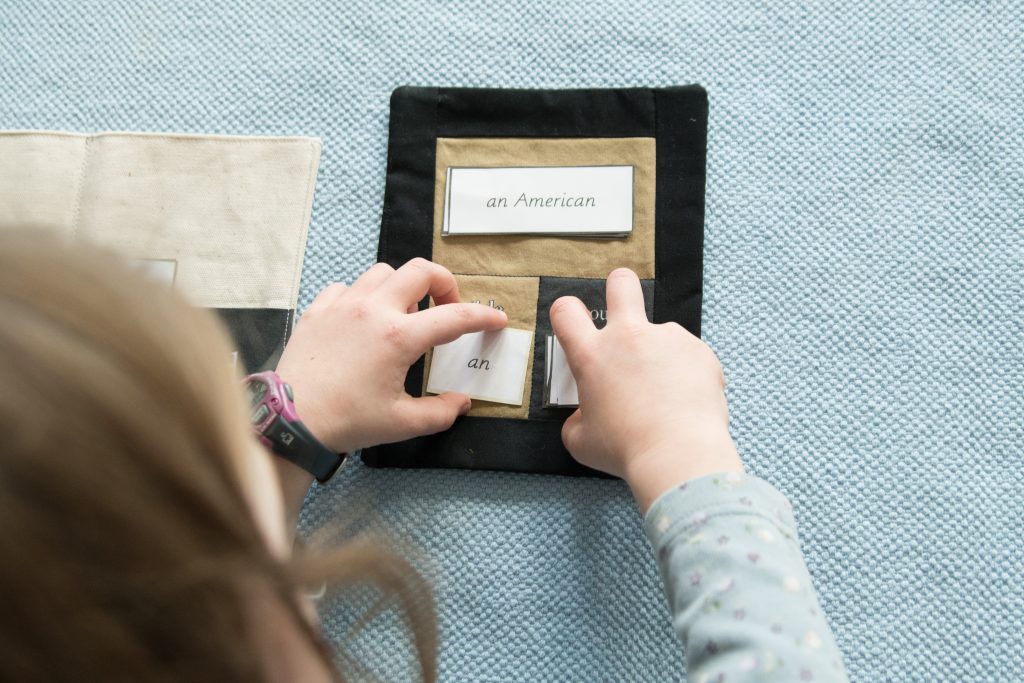
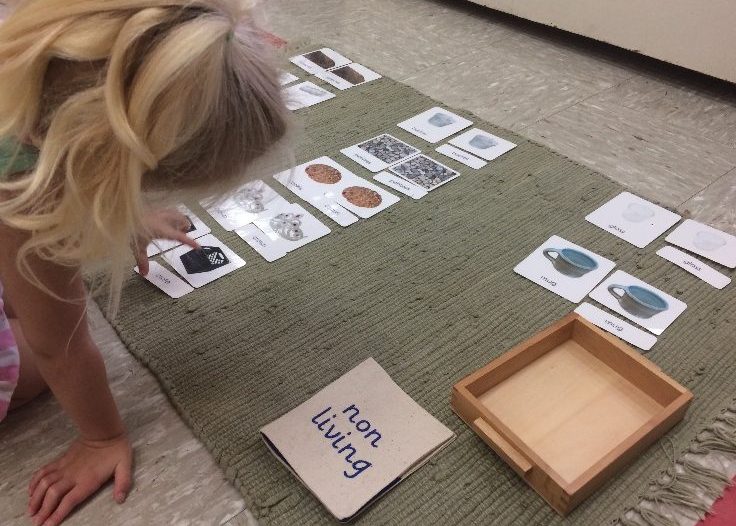
The Montessori Elementary Grammar Boxes are a series of…well, boxes, which are used to house and sort the Grammar Card Materials. The idea is that once a child has a lesson (often called a Key Experience) to teach a part of speech, the Grammar Boxes are used to give the child more practice with the concept by building phrases or sentences using the parts of speech they have learned. The series begins with box 2, which houses two parts of speech–article and noun. There are three types of boxes in the Grammar Boxes set, so let’s talk about the role of each.
The first are called the Grammar Filling Boxes. These are 36 wooden boxes which are color coded according to the part of speech that the child will focus on. Each box has a progressively more complex set of phrases and sentences and individual word cards, which are used to rebuild the sentences (more about that later).
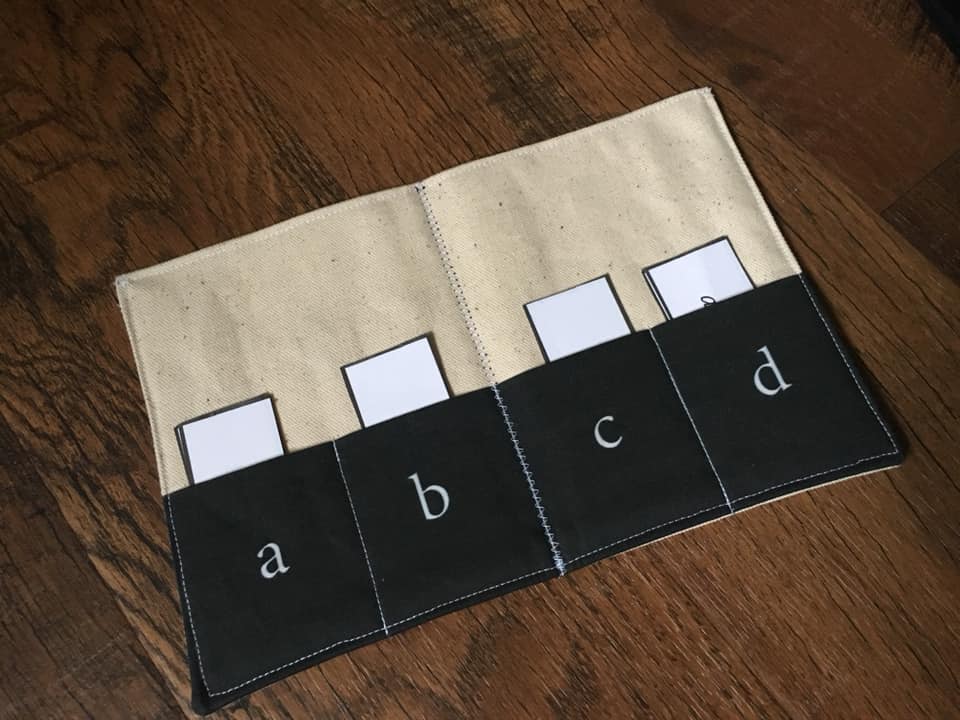
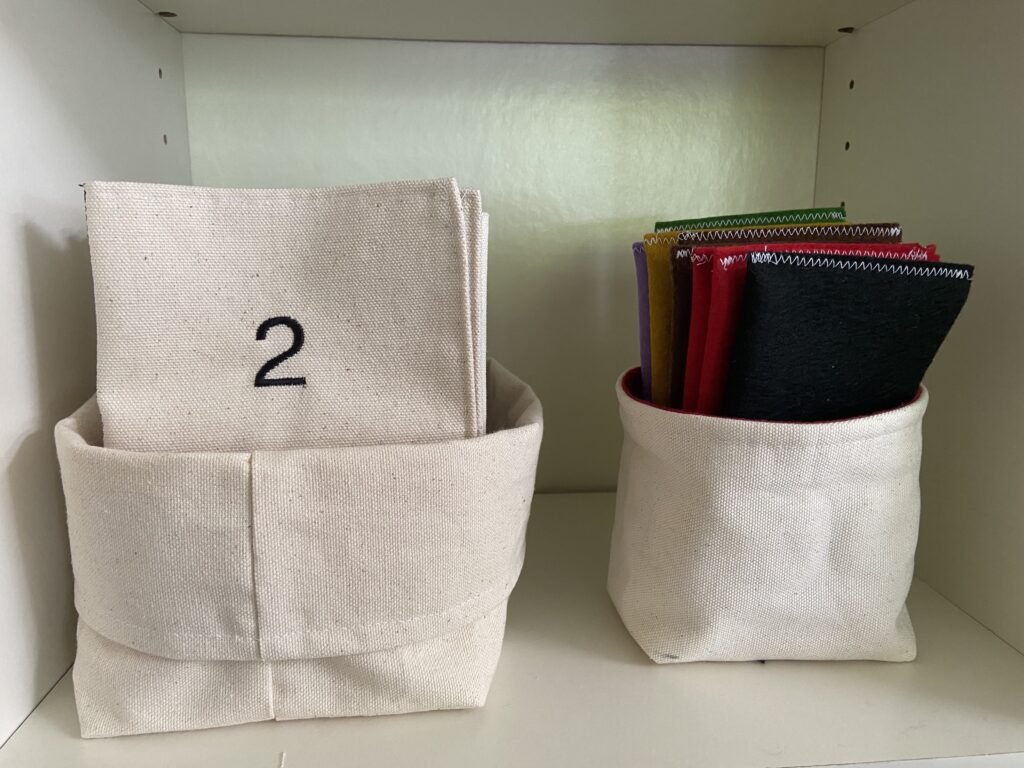
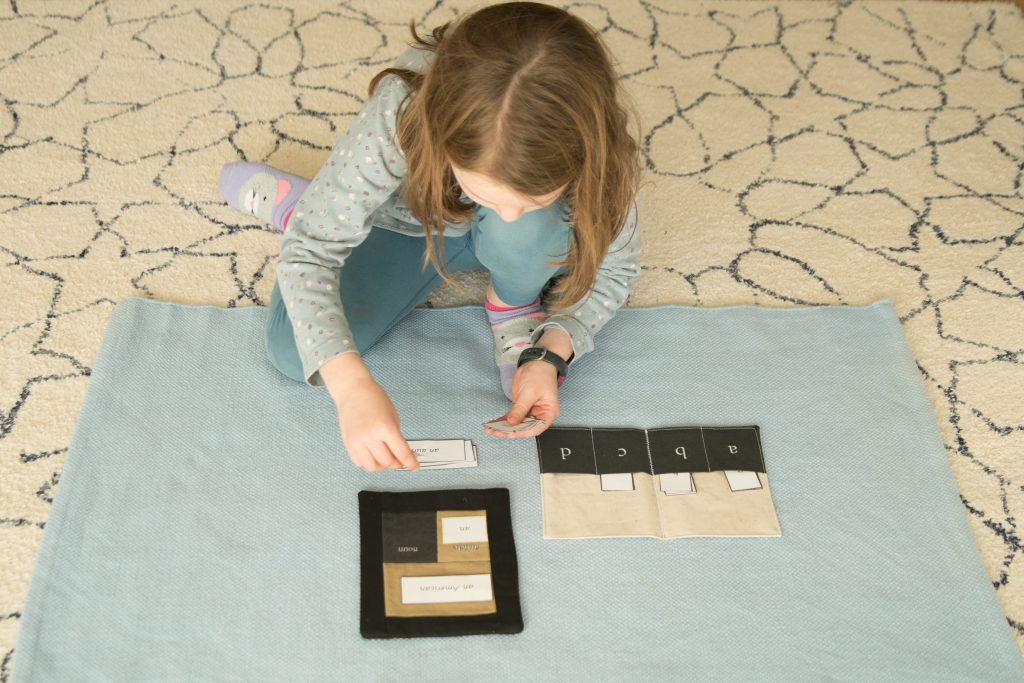
The set that I make is a little different. Instead of all those wooden boxes, I make 8 organic canvas envelopes, each with an embroidered number on the front, which tells you the number of parts of speech studied in that set. Each Envelope is like a small folder with labeled pockets inside. So for example, instead of 4 wooden boxes for the noun-article set (Box 2), I created one envelope with four pockets. I also make a canvas bin for these to neatly sit inside on your shelf.
Instead of four wooden Filling Boxes, I make one organic envelope with four pockets.
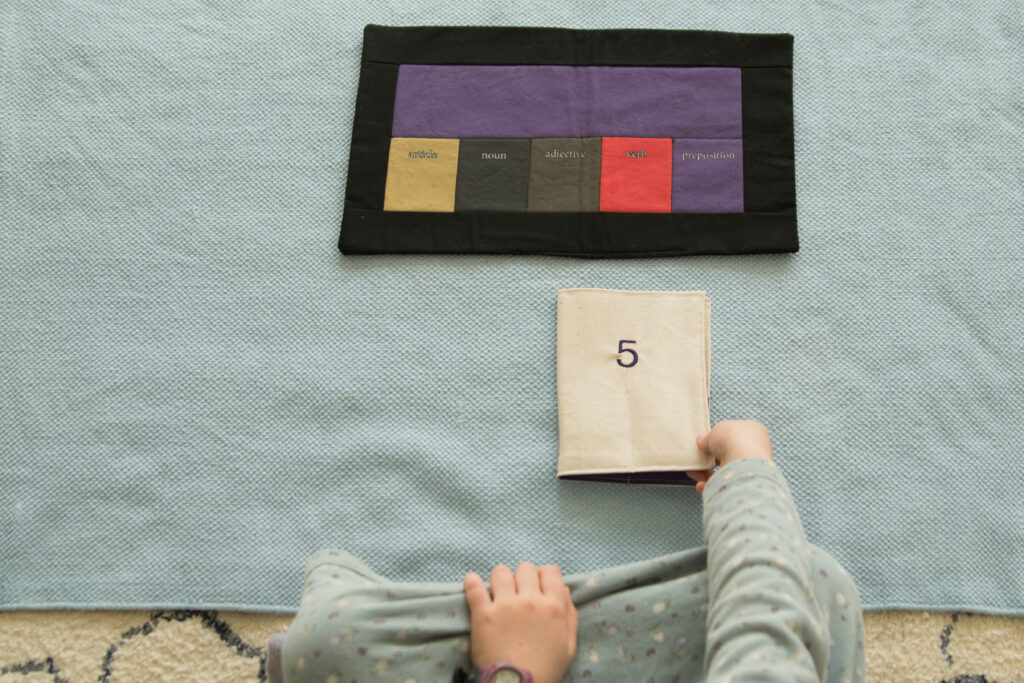
The second type are the Sorting Boxes,these are used by the child to sort out the card material when using the materials found in one of the Filling Boxes. There are 8 of these boxes, each one adds a new part of speech. The first Sorting Box has two parts of speech (noun and article) and so it’s commonly called Box 2. There is no Box 1, because if there were, it would be the study of nouns and we can’t make phrases/sentences with only one part of speech.
Instead of large and bulky boxes, I created a set of Grammar Box Mats, which are made with organic cotton. These are just as beautiful as the wooden version, but can be stacked on the shelf, and take up much less space! I also make a printable version of the Grammar Box Mats for those who are on a tight budget.
Grammar Box mats are beautiful and stackable!
The third type are the Command Boxes. These boxes are open on the top and hold Command Cards and Exercises, which are fun activities/actions for the child to do to practice each part of speech through commands/actions. In other words, they tell the child to act out a part of speech in some way. There are typically nine of these boxes, one for each part of speech, and two each for the adjectives and verbs.
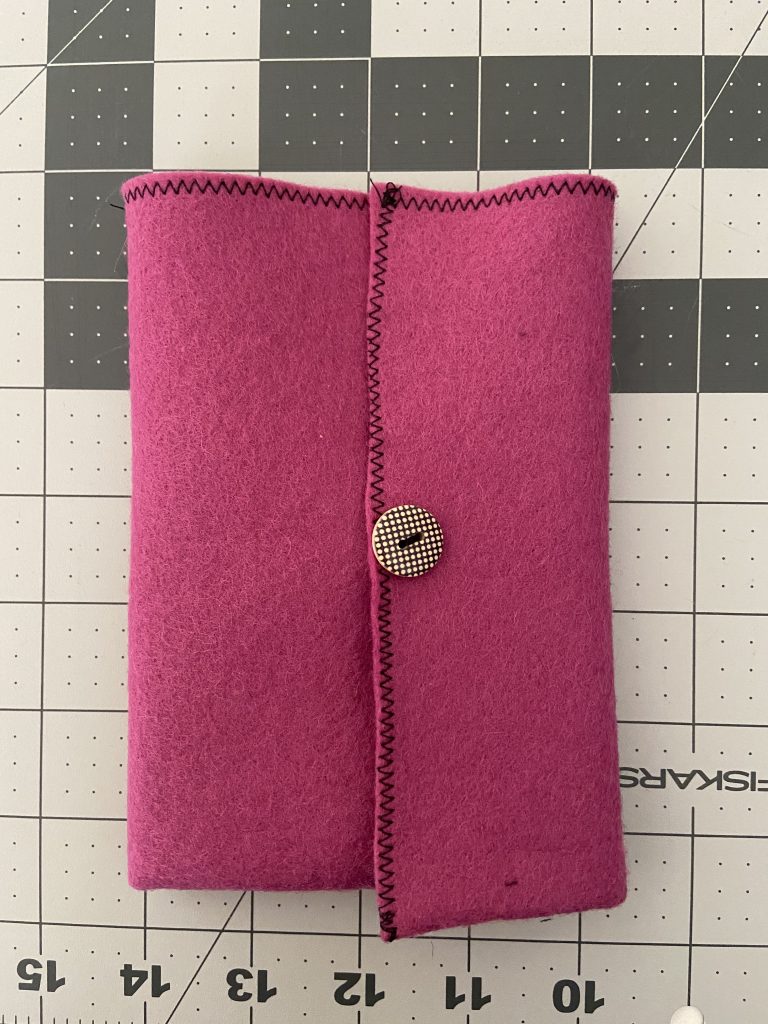
Instead of wooden boxes, I made Command Box Envelopes. I left these open on the top to mimic the original box design, and used the traditional colors in vibrant organic wool felt. I also make a small canvas bin for these envelopes so that they are easy to display on your shelf. My children LOVE these.
All the Grammar Box Filling Envelopes and Command Box Envelopes fit inside one small Ikea cube shelf.
Grammar Card Material: What does it include?
Now that we understand all the boxes, let’s talk about what goes inside of them! Each Filling Box contains a set of phrase/sentence cards AND cards which have the individual words contained in those phrases/sentences. The word cards each have a different color depending on which part of speech they are.
As I said above, after a child has had a Key Experience Lesson (this is a creative introductory lesson) on a part of speech, they use the Grammar Box materials to practice building sentences and phrases using the parts of speech that they know about. As they progress through the series of boxes, the exercises get more complex and include more parts of speech.
Need help teaching the key experience lessons? Check out my grammar tutorials! I show you exactly how I taught them to my children to give you an idea of what might work for yours.
My Grammar Card Material is a little different from the traditional set in two ways.
The first is that although I based the cards on what is included in The Advanced Montessori Method, I modernized the language and changed all the references to Montessori Materials to common objects so that they are useable by everyone–not just fully equipped Montessori schools. So for example, if a Command Card asks a child to do something like move a part of the Pink Tower or Brown Stair, I changed the noun to be something else that everyone will have on hand, like a wooden block.
The second way that my Grammar Card Material is different is that it is not as extensive. I cover all the same topics of study, but there are fewer exercises for each concept. I think you’ll find that you will have plenty of material to work with (even this abridged version is 219 pages), and your children will love the blank forms I included for them to use to make up their own sentences and commands. (These were my children’s favorite part, they loved customizing their set with beloved stuffed animals and other special objects from our home.)
Whether you choose to buy the traditional wooden materials or my fabric set, I hope that this information helps you to feel more confident about teaching grammar to your children at home! If you have questions, please leave me a comment!
Teaching about grammar with worksheets is probably one of the most overwhelming and boring things homeschool parents face. It’s right up there with higher level math! (Which I also love teaching, because I’m a huge nerd.) But it doesn’t have to be all meltdowns and tantrums (by teachers or students), it can actually be fun and memorable and easy. Enter our grammar savior, the Montessori method! (I’m cheering, are you?)
I started a grammar series on my new YouTube channel in March, and if you’re feeling overwhelmed by how important and significant and scary grammar is to teach, I invite you to come and take a look at how we taught it to our children. I think you’ll find that it’s very doable and that while the excitement you experience may not be roller-coaster- level, it can be enjoyable.
Here is the material list for the Adjective lessons:
Adjective PDF: This includes the lessons written out for future use and reference, as well as the blank cards, paper versions of the mat, and grammar symbols.
Grammar Box Set This is everything you need to teach all the parts of speech! It includes the Grammar Box Sorting Mats, Grammar Box Filling Envelopes, Command Box Envelopes and all the card materials. I also sell the Grammar Sorting mats and Grammar Card Material as printable downloads.
I’m getting a lot of questions about how we manage to work from home and also teach our children at home, so I decided to make a quick video for you all with my tips for making it all happen.
Also, I promised a quick outline of our daily schedule, so here it is. Keep in mind that this is what works for us! Watch my video for tips on discovering what will work best for you.
Family Rhythm Parents wake and have personal time/showers Kids wake and read/relax for a bit Kids empty the dishwasher 7:30 Breakfast and morning meeting Kids personal hygiene Kids exercise time (walk dog, bike trainer, treadmill, play outside) Chores for adults and kids School work and music practice (parent available to teach and oversee) 12 Lunch prep, eating and clean up Parents work and children work/play independently on projects (also scheduled lessons/playdates at this time) 5 dinner prep, eating and clean up Family time 8:30 Kids bedtime Adult work/relax time 10 Adult bedtime
And here is the list of my favorite resources for helping you get through this time!
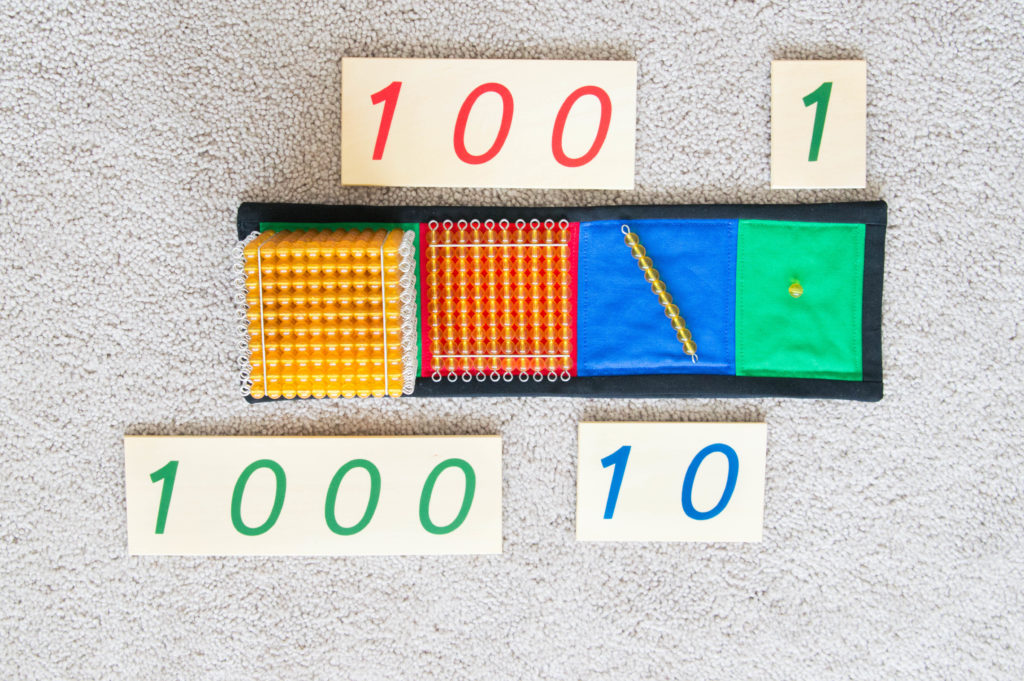
If your child can count 0-10, understands the number symbols for these qualities, and can match the quantities to their symbol, they are ready to use my FAVORITE Montessori Math material–the Golden Bead Material.
Head on over to YouTube to watch my tutorial for this foundational lesson and let me know if you have any questions!
Hey Homeschoolers! Head over to my Youtube channel to watch my tutorial on how to introduce nouns to your children the Montessori way! This is the first tutorial in my continuing series, featuring videos that explain exactly how we taught our children all about the parts of speech.
Montessori grammar work is simple, hands-on and memorable.
I love the Montessori approach to grammar because the concise, simple and sensory-rich lessons really stick in a child’s mind. So get ready for a hands-on, not-boring, easy-to-understand, simple-to-teach grammar lesson that’s based on the scientific research of Dr. Maria Montessori. After watching my tutorial, I hope you’ll feel confident about how to present the materials to your children, and great about helping them to have a concrete understanding of grammar from a young age.
You can also find the written instructions for my tutorials via digital download in my shops on Teachers Pay Teachers and Etsy.
And here’s your handy, linked material list for the noun lessons:
Hey all you DIY Darlings! Although I make gorgeous 3-part card envelopes in my shop, I totally understand that these organic embroidered versions are not always in the budget. So I’ve created this sweet little felt pattern for those of you who want to make your own. Yes I’m talking to you, even if you are not super comfortable with sewing yet!
Felt is very forgiving, if you make a mistake, just remove the stitching and try again!
You can find the pattern here and here is a linked (some are affiliate) list of the materials I used, which you might not have on hand.
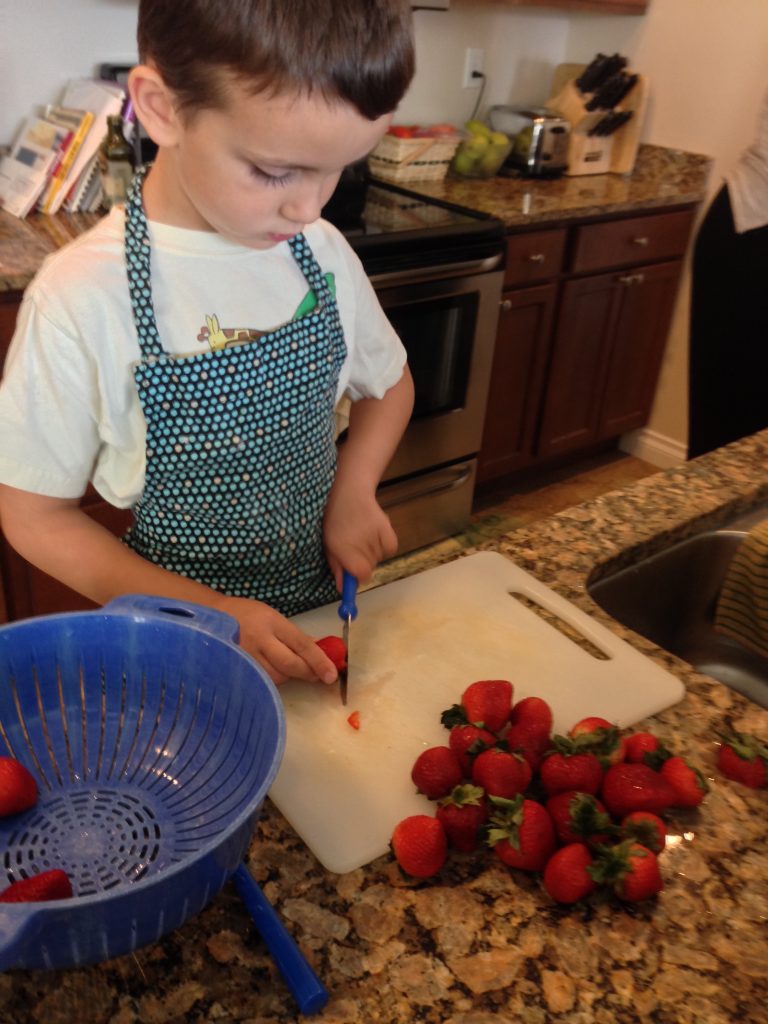
Set your child up for success with step stools and child-sized tools that really work.
Every good Montessorian will tell you to allow your children to do things for themselves. After all, Maria Montessori famously said, “Never help a child with a task at which he feels he can succeed!”
You’ve probably seen the beautiful Instagram and Pinterest images that include things like low cupboards for dishes and step stools at sinks. These accommodations are a hallmark of the prepared Montessori environment, sure, but their implementation doesn’t always look like the perfectly curated images you find on social media platforms.
So while it’s wonderful to watch children doing things for themselves, if you’re a parent trying to follow the child at home, it can be disheartening to see these perfect pictures. The truth is that following the child is messy, and sometimes hard.
There is an actual mess that comes from letting children practice independence. And sometimes you need superhero-level restraint to let them try and fail and try again without intervention.
With this in mind, here are five of my tried- and- true pro tips for keeping your patience in tact and the mess under control.
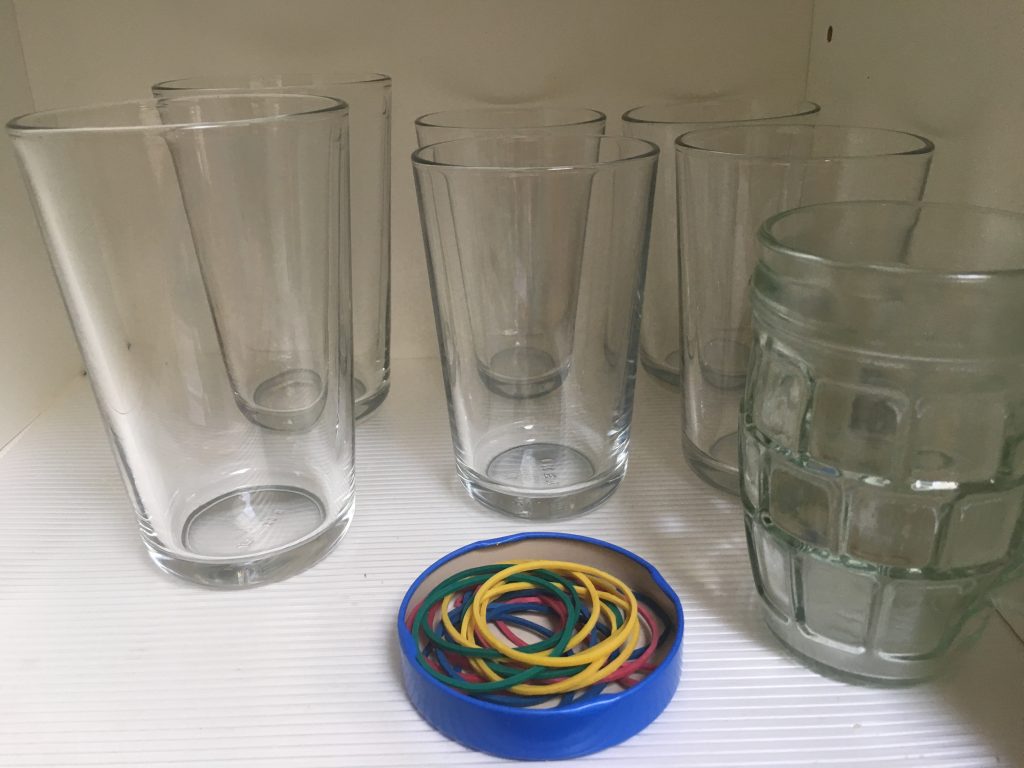
Stop the madness, my genius solution to too many dirty glasses!
Tip One: Rubber Bands OH MY GOSH, the water glasses. Every time a child got a glass of water in this house, they used a new cup. And of course they never finished the water either–just took a sip and left it on the counter, only to forget it was theirs and get a new one 15 minutes later. And yes, of course the children can and should be involved in washing said glasses, however, until your child is able to really notice things like dirt, you’re still going to be rewashing all those cups.
So here is my brilliant solution. It actually works and it’s so simple and cheap; it’s rubber bands. I bought multiple colors of cheap rubber bands from an office supply store and store them in small dish next to the drinking glasses. Each person in our home picked a color and puts one on their glass when they get it out of the cupboard. At the end of the day, we slip off the band, rinse the glass and stick that baby in the dishwasher! Kids have friends over? No problem, everyone gets a color! No more asking whose glass is whose.
Tip Two: Hand Broom and Dust pan Kids get crumbs everywhere. They just do. I bought a hand broom and keep it next to the practical life work. When the children are done eating or doing a messy work (sensory bins anyone?), one child gets the broom and sweeps up before the other wipes the surface with a damp cloth.
Tip Three: A Place for Everything Take a cue from the minimalists and make sure that you don’t have too many options available for your children, and that everything has a specific home to return to. If you want children to help you to keep the space tidy, they must be able to actually put things away. For example, if you want your children to empty the dishwasher, they will need to be able to put the dishes away without help. So if putting away dishes in your home requires a Jenga-like stacking experience, your child won’t be able to help effectively. Do yourself a favor and share some of your excess so that you and your child can easily put away what you really use and need. Same goes for toys, books and clothing. If it’s too difficult to put things away, you will be the one doing all the clean up.
Take a deep breath and remind yourself that you can wait.
Tip Four: Practice Patience When we are waiting for children to accomplish what we are able to more efficiently do ourselves, it can be hard to hang back and let them flounder. My advice is to practice. In our world of hurry, it doesn’t come naturally to slow down and wait for a child, but that is exactly what you need to learn to do. Teach yourself patience by practicing it. It’s okay to give instruction when needed, but let the child do what he or she is capable of doing without intervening, even if it takes longer–and it will. I often say aloud, “I’ll wait for you.” This simple phrase reassures my kids that I don’t mind waiting, and it reminds me of my goal–I want them to do it themselves and to experience the joy of accomplishment.
Tip Five: Plan More Time This relates to tip four, and it’s really essential to the successfully patient parent. If you need to leave the house or eat a meal or start a lesson at a specific time, plan to give your child more time than you need to do the same tasks. For children ages three to six years, I recommend doubling the time it takes for you to the same activities. For toddlers, triple it. So for example, if it takes you 15 minutes to put on your shoes and coat and gather your things to get in the car, you should expect your toddler to take 45 minutes and your 3-6 year old child to take 30. Seems like a long time doesn’t it? But that’s how long it realistically takes for you to patiently guide them and let them do it themselves.
I hope these tips are helpful to you! Happy learning and enjoy the journey!
Watch Carefully It’s a new calendar year and this is the mid-way point for our school year. This is one of the times that I like to spend time really reevaluating our learning environment.
We are homeschooling our children, and I love it. But I haven’t always been a homeschooler. Before my children were born, I was fortunate to study and work in a Montessori school. And one of the most important lessons I learned as a Montessori guide was the power of observing the children.
Before you add anything beyond the basics to your classroom, I urge you to take a note from Maria Montessori and spend some time really getting to know what makes them tick. If you are a homeschooler like me, you’re probably thinking that you already know your children like the back of your hand. But if you take some time to quietly watch them, and take notes, you may be surprised!
Watch for This
Ask yourself what they are most excited about. Don’t just think about which subject areas they love, but focus on which parts of that subject excite them. What do they struggle with, and why?
Do your best to never interrupt a child who is engaged in her work.
And one other thing. Take the advice of Dr. Montessori herself and be as silent and still as possible while you observe. Don’t let the children know what you are doing, and don’t interrupt them. Now is not the time to help or correct them, just watch carefully. Unless they are in danger, stand down!
If you have smaller children get down on your knees and observe the learning environment from their perspective. Your goal is to make your space as easy for them independently access as possible. That may mean adding step stools or placing dishes on a lower shelf in the kitchen, for example. How about adding a hamper that they can carry to the washing machine themselves?
After you have spent at least a week on this careful study, sit down with your notes and start to brainstorm about how to create a rich environment that will spark their enthusiasm for learning. Then, carefully prepare the learning space in a way that is easy for them to navigate.
Your time observing is by no means finished. Continue to watch the way that your children interact with their learning environment and make adjustments accordingly. I keep a notebook in my apron pocket to jot down notes for myself. You could use a smart phone of course, as long as it doesn’t distract your children!
Low tables and easy access to creative supplies facilitate creativity.
Tidy space
One of the hallmarks of a Montessori learning environment is its tidiness. To the casual observer it can appear cold, almost sterile. However it has a purpose, which is to prevent distraction and draw attention to the beautiful materials. Observe your children carefully and you will be able to tell if you need to remove some distracting items from your space as well. But keep in mind that your home doesn’t need to look like a Montessori school. Trying to perfectly emulate a school environment is neither practical nor optimal for homeschooling families.
I can tell you that our classroom at home is much different from the classroom that I previously worked in, but a home environment has advantages as well. Observe your children, and you will soon discover what works best for them!